Hiking Roys Peak
There’s no need to convince you to hike Roys Peak. Chances are you’ve seen photos of the viewpoint from the top and for us that was enough. Despite growing up in New Zealand neither of us had completed the hike, but over the years it’s become more and more popular. Wanaka is by far our favourite place in New Zealand and we’ve spent a considerable amount of time there, so it was about time we were treated to one of the best views of the lake and Mount Aspiring. We’ve put together this blog to share with you everything you need to know if you’re taking on this hike!
We wanted to be prepared, so we decided to check out Google beforehand. However the information we got was conflicting: one website said it was 5.5km, one said 6.5km, one said 8km…we really didn’t know what to expect (in the end our running watch said 9km). And as usual, that famous Instagram photo of the lookout is just another case of the expectation vs reality that we weren’t expecting. Who knew that this hike was so popular with tourists that the carpark is always full, there are queues waiting to get “that shot” and that many people don’t even make it to the summit…
This is a hike you’ll only want to do once so here are our tips to make sure it’s worthwhile!

The lookout point
Check the Weather
Before you even put on your shoes make sure you check for a cloudless day. Clouds tend to hand around the peak and in our opinion, there’s no point in committing to hike of this size and getting to the top and not being able to see a thing. We kept a close eye on the weather including the cloud coverage (we use the AccuWeather app on our phones). Unfortunately, one single cloud could ruin your visibility, and for us, one giant cloud just happened to be hovering around the summit when we reached the top. We couldn’t even see 5 metres in front of us.
So what did we do? We Googled Wanaka live cams from the top (yes there is reception). There we found a live shot of the lake from town looking sunny and clear, meaning were just stuck in morning cloud that would eventually burn off. We waited around an hour and sure enough, the clouds slowly burned off and we we’re treated to the most incredible views. Don’t make the same mistake as others. We saw a few groups take some photos in the clouds then head back down to the bottom. One even laughed at us when we said we were waiting for the clouds to disappear! An hour later they would have looked back up to not a cloud in sight! If you’re committing to a 5-6hour hike then what’s one more hour for those views!

Visibility near the summit
Start Early
Even if you’re not heading up for sunrise then we recommend starting early. We weren’t committed to a 3 am start in time for sunrise, but we didn’t want to be walking up in the heat of the sun. We decided to start the hike just after 7 am. You’ll take a risk with the weather when you start in the dark but we have many reasons for doing so.
Firstly, when you’re sitting in the carpark in the dark contemplating life, you won’t be able to see the radio tower at the top and therefore you’re less likely to turn the car around and go home. Secondly, it means you’re half asleep when you start the hike. For us, the first hour went surprisingly fast and we hardly remember it. Thirdly, while you won’t be at the top for sunrise, you’ll see the sunrise on the way up and this helps take your mind off the fact that all you want to do is lie down and roll to the bottom (okay it’s not that bad). Lastly, we somehow missed the crowds…the sunrise hikers were already on the way up or already at the top when we arrived and lots of others seemed to start mid-morning. We only saw a handful of other walkers the whole way up.

Sunrise over Lake Wanaka
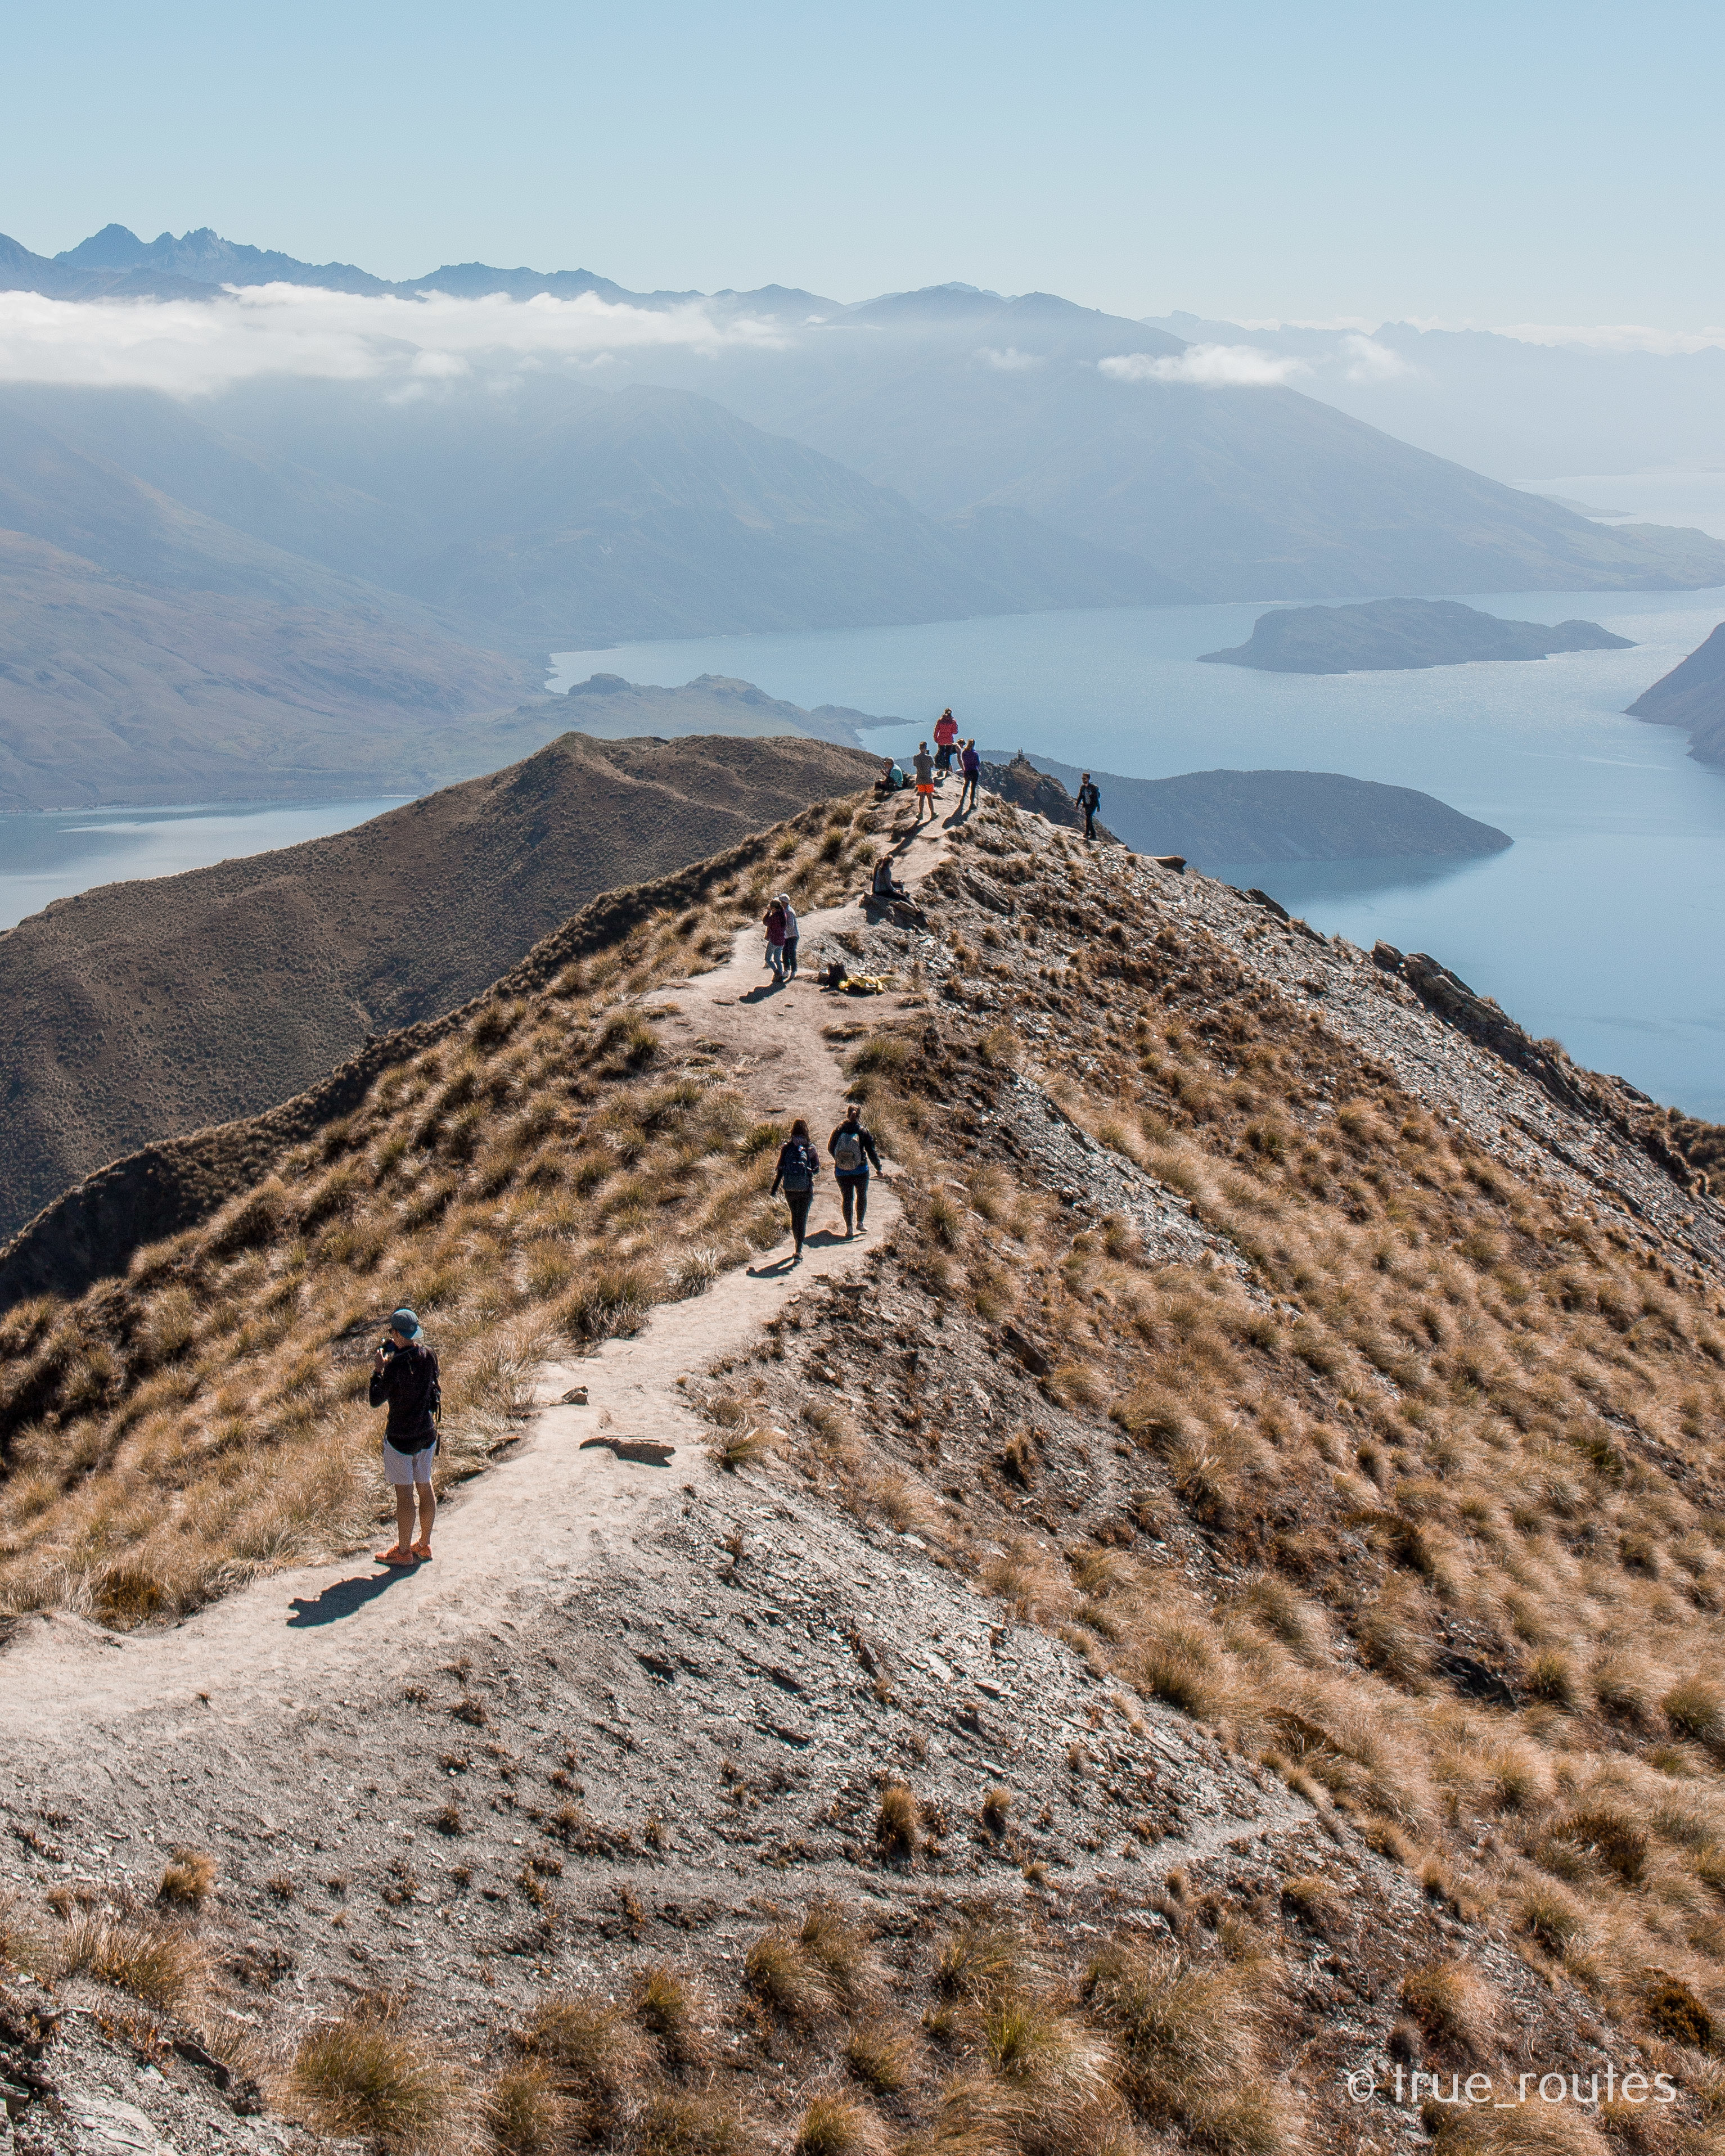
Actually go to the Top!
This isn’t a joke! A lot of people we saw didn’t even go all the way to the summit. The whole way up we had our eye on the radio tower at the summit and figured this is where the lookout was. We were wrong. About half an hour from the top you will reach the lookout point. This is where crowds of people will all be sitting around and queuing for “that photo”. You know “that photo” you would have seen all over Instagram. There’s even a toilet here, so while you think you’ve made it you only need to look up to realise you’re not at the highest point.
How many people were at the summit when we made it up? Five. How many people were at the lookout point? Fifty. We saw so many people get to the lookout, start cheering that they had made it, take some photos then head back down. If you’re going all that way don’t you want to say you actually hiked Roy’s “Peak”!

Breathtaking 360-degree views
Bring plenty of water
This is probably a given, but you’d be surprised at how much water you actually go through on the way up. Don’t underestimate how thirsty and hungry you’ll be after a three-hour constant uphill hike. We took just over two litres with us and could have easily gone through more. There are no drinking water facilities at the top or bottom so make sure you bring water with you from Wanaka. We also took a handful of bananas and muesli bars with us, but we recommend taking something a bit more substantial, especially if you’re starting early and haven’t had a decent breakfast.
Bring layers
This was one we weren’t prepared for, at all! Even though you’ll get very hot hiking up, you’ll cool down very quickly once you stop at the top. Bear in mind you’ll have to carry all the layers up with you, but at an altitude of 1’500m, it gets super cold. It even snowed the week after we went and the peak was snow-capped for a few days. The DOC website warns of hypothermia even in summer and we can definitely understand this. If you feel the cold like Hayley, then don’t wear shorts like she did. Wear full-length tights and bring a warm jacket for the top. Reality check…you will get sweaty on the way up so bring a spare, dry t-shirt to change into. If you’re going up for sunrise and likely to be sitting at the top for a while then be prepared…most of the sunrise hikers we saw were wearing warm jackets, beanies, gloves, scarves etc. Wear comfortable trainers or hiking boots but boots aren’t a necessity. It’s a dry, gravel road the whole way and we were fine with running shoes.
If you want “that photo” be prepared to wait
This hike has become super popular in the last few years and during high season the carpark will be full (high season in New Zealand is December-February). We went mid-March and it was still very busy. When we arrived at 7 am the carpark was already half full of sunrise hikers and overnight stayers, and by 9 am it was full. To avoid parking on the road then we suggest getting there early. If the carpark fills up that quickly then you can imagine how busy it is at the top. Be prepared to queue to get a photo at the lookout. If you’re following our travels then you’ll know we absolutely hate crowds and queues tend to ruin the experience for us. So once the clouds cleared we got out of there and went to find some photo spots all to ourselves – there are plenty on the way down!
Reality of getting “that photo”. What you don’t see are the crowds standing where this photo was taken.

Finding our own photo spots on the way down
Be Prepared
No, you don’t need to be an experienced hiker to take this on. But don’t underestimate this hike. It is a difficult hike and you are literally walking uphill for 8km with a 1’200m climb. Brendon and I aren’t regular hikers, in fact, the only walk we did before this was Mt Iron which is a half hour uphill hike. We are both relatively gym fit and while this helped our fitness levels for the climb, it didn’t help with muscle fatigue. At halfway up our shins and calves were aching and this is what slowed us down. Short, regular breaks were needed. On the way down, the same again. While it doesn’t require the same level of fitness, walking downhill at that incline is just as tough on the knees and calves. And while we usually like to jog downhill to make it easier on the knees, this track is loose shingle and at that incline, it’s not the best for jogging down.
To help prepare you mentally, the start and the end are the steepest. The first hour is a steep zigzag straight from the carpark through the green. You will eventually reach the grave of Mr Wallis (who owned the Glendhu Station). From here the track flattens out as you walk left towards the highest radio tower. The second half is back to a steep zigzag directly under the radio tower. Once you get to the lookout point it’s about a half hour walk to the summit.
It took us three hours to reach the summit and two hours on the way down. The guides say it’s an 8km one way but Hayley’s running watch recorded 9km. While we tend to walk faster than suggested times, we needed the full three hours for this one. Partly due to muscle fatigue meant by the end we were taking short breaks every few minutes and partly because it’s hard to maintain a consistent speed the whole way.
This is definitely a hike for the bucket list, but to be honest it’s quite a boring hike. It’s literally one long zig-zag. You’re walking through farmland so expect to pass some sheep on the way up, but that’s about as scenic as you will get. For us, this was an “accomplishment” hike and you do it all for that view. Once you’re at the top and you’re looking out over Lake Wanaka and Mount Aspiring, it’s absolutely breathtaking and like nothing else we’ve ever seen. In other parts of the world, you would have to pay hundreds to take gondolas or helicopters to reach a lookout point at this altitude. But here in New Zealand, you can hike them for free. And it’s a pretty amazing feeling when you’ve accomplished a hike of this magnitude and rewarded with this view.

Views on the way down
Facts:
Length: 16km return
Time: 5-6 hours return
Difficulty: Hard
Change in elevation: 1’228m
Toilets: carpark and lookout
Track closed: 1 October – 10 November every year for lambing
Getting there:
The carpark is located 6km from Wanaka on Wanaka Mount Aspiring Road. It’s not hard to find. If you don’t have a car then there are plenty of shuttles that run from Wanaka town, including Ritchies.
Don’t forget a gold coin donation for the honesty box at the start of the track…it’s pretty incredible that walks like these are still free!
Coming soon….a guide to our favourite walks around Wanaka!
Like this post? Pin it!

2 comments
Comment by Sam & Yass
Sam & Yass April 5, 2018 at 8:48 pm
This is one of the most well-written and detailed blog posts we’ve ever read! Thanks for all the info guys, it will surely be helpful when we make it to New Zealand later this year! Can’t wait to read all your other posts about New Zealand 🙂
Comment by trueroutes
trueroutes April 12, 2018 at 10:00 am
Thank you so much guys! Be sure to take on this one, the views are definitely worth the struggle 🙂 working on some more New Zealand ones now!
Comments are closed.